Are you having issues starting your dirt bike and you are pretty sure that everything is okay? If your machine is powered by a battery, you need to take a moment and inspect it since it could be the reason.
How can you change or replace your dirt bike battery? Well, here is a complete step-by-step guide you need to follow:
- Read the manual
- Locate your battery and access it
- Disconnect the negative cable
- Remove the positive cable
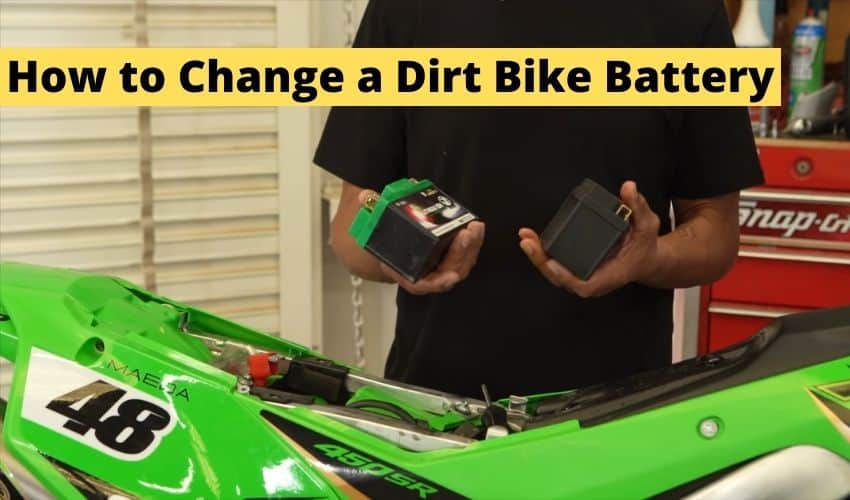
- Remove the battery
- Install the new battery
- Hook up the cables
- Test it
A dead dirt bike battery can be a nuisance at the most inopportune time. Some dirt bikes have gas engines that require a functional battery to start the engine while others are completely battery powered.
No matter the type of dirt bike that you own, you need to make sure that the battery stays in good condition to avoid frustrations at the most unexpected time. Your battery may misbehave as a result of neglect, age, or extreme weather.
However, the good news is that your dirt bike battery is designed to provide three to five years of reliable service as long as you take good care of it.
But, what are you supposed to do if your battery is dead? Well, you need to replace the dirt bike battery as soon as possible.
Luckily, removing your dirt bike battery is a relatively simple process that shouldn’t worry you so much.
As long as you have some little knowledge about the various dirt bike components and where they are located, you should be in a position to change your battery within a few minutes.
In this post, I will guide you on how to change your dirt bike battery and also let give you a few tips that can help you keep your battery in great shape for quite a long time.
Contents
Changing Your Dirt Bike Battery step by step
Follow these simple steps to access and remove your dirt bike battery:
- Read the manual:
Some people tend to think that the dirt bike manual is a useless thing, but that isn’t the case. There are many times when you need to read the manual and changing your battery is one of them.
Make sure that you read the manual and understand it since it will guide you on how to access the battery plus the safety precautions that you need to observe.
- Locate your battery and access it:
Park your dirt bike on a flat area and make sure that you turn off the engine. You should also make sure that there are no flammable liquids or open flames in the area.
Ensure that you wear protective gear including hand gloves and clothing that will help you avoid coming in contact with the acid. The battery section of most gas-powered engine dirt bikes is usually mounted under the seat.
If your battery compartment is situated in such a position, you will have to remove the seat to access it. However, most electric bikes will have the battery compartment on the side. Your owner’s manual will help you determine the exact location of the battery compartment.
- Disconnect the negative cable:
Once you gain access to the battery, the first thing you need to do is disconnect the negative cable which is usually black and is connected to the corresponding negative (“-“) terminal on the battery.
By dealing with the negative cable first, you minimize the possibility grounding out your battery. Once you have disconnected the negative cable, carefully tuck the cable away so that it doesn’t make accidental contact with the battery terminal again.
- Remove the positive cable:
Once you have broken the circuit, you can safely disconnect the positive cable which is often red, and connected to the positive (“+”) terminal of the battery.
- Remove the battery:
Since you have disconnected the cables, you can now proceed to remove the battery. Remove any hold-downs that have been used to secure the battery and carefully pull the battery out.
You need to be cautious when pulling your battery out since many batteries tend to have “hollow” terminals which house the lead nuts that the bolts retaining the battery cables usually thread into.
- Install the new battery:
The first step of replacing your battery is conducting a thorough examination. Make sure that the old and new batteries are of the same size, and the new battery is of similar power to the one your dirt bike requires.
You should also examine the battery terminals to identify the positive and negative terminals so that you don’t reverse them. If your new battery needs to be filled with battery acid, make sure that you do so before you install it.
You should be aware of the fact that some dirt bike batteries come without acid. If you have such a battery, be sure to hit your local dirt bike shop and let the mechanic fill it for you.
Make sure that you follow the manufacturer’s filling instructions and make sure that you do everything in a well-ventilated room. You will also need to charge your replacement battery before you install it.
- Hook up the cables:
The first thing you need to do is to insert the lead nuts back into the terminal “hollow” and then position the battery in place.
Reattach the cables, and you are good to go. Make sure that you brush the cables if they show any signs of corrosion and if they are badly corroded, replace them.
One thing I want you to take note of is that the installation process is the opposite of removal. Therefore, you need to attach the positive cable first before you connect the negative cable.
If you aren’t careful, you may end up with several damaged electrical components.
- Test it:
Before you put everything back, turn the ignition on to confirm that you have got power. If you insee light, you are set to go.
Turn the ignition off and put everything back in order. If you turn the ignition on and nothing happens, examine your connection to identify the mistake that you might have committed.
Reinstall any other thing that you removed to access the battery and enjoy your ride.

A Safety Warning
If you aren’t sure of what you are supposed to do, let a mechanic change the battery for you.
If you have never dealt with a dirt bike battery before, keep in mind that it is never a good idea to allow anything that is a good conductor of electricity to connect to the positive terminal of your battery.
I still insist that if you are unsure of what to do, make sure that you consult a professional.
When to Change Your Dirt Bike Battery
Before we dive deep into how to change your dirt bike battery, you need to know when it is time to do so. A sad issue in a dirt bike’s battery life is that most riders will only try to address the various battery issues when it is already too late.
However, several signs will help you tell when your battery needs urgent attention. Here are some of the telltale signs that your dirt bike battery requires your attention.
Your battery is more than four years old: Typically, dirt bike batteries have a specific lifespan that you need to keep track of every time.
If you notice that you are having issues when starting your bike, you need to ask yourself when your last battery was installed. A good preventive maintenance task is to change your battery when it gets closer to the end of its lifespan.
You have been regularly letting your dirt bike sit for long periods without riding it. Typically, a dirt bike battery will lose approximately 1% of its charge per day when you aren’t using it.
You need to use your battery quite regularly to keep it in good condition. If you don’t ride regularly, make sure that you take your bike on a long trip before you put it away.
This might remedy the problem slightly, but you may still be forced to replace your battery sooner than later.
If you try to start your engine and it struggles more than usual. This is an indicator that your dirt bike battery isn’t holding enough charge to ignite the engine.
However, this sort of battery “testing’ requires that you really understand your bike and how it roars whenever you start it.
Although the sticker on your battery shows that it is a 12V battery, the truth is that a dirt bike battery holds more charge and more is required to start your bike.
You may also be forced to replace your battery if you have discharged it several times. Standard dirt bike batteries can only handle discharging a few times before they are unable to take a full charge again.
Inspect Your Battery Thoroughly
Before you decide that it’s time to replace your dirt bike battery, make sure that you take a moment and inspect your entire battery thoroughly. Sometimes, you can easily tell if your battery is bad by simply looking at it.
Some of the things that you need to inspect include; broken terminals, excessive leaking, discoloration, the existence of a bump in the case, and cracking/rupturing of the plastic.
If you notice any of these signs, make sure that you replace your battery. Loose or broken terminals are quite dangerous since they can easily cause a short circuit.
If a short circuit occurs, your battery is discharged instantly which can even cause it to explode.
Conclusion
You now have a new battery, and you are ready to enjoy your ride.
Make sure that you take good care of it so that it can serve you for as long as possible.
Have you ever changed your dirt bike battery?
I’d love to hear your story and how you went about it in the comments section.